


 Follow Us
Jump To: M Dwarfs With High Priority
Using Advanced Search: M Dwarfs In The CTL
This tutorial will show you how to use the Advanced Search capability of the MAST Portal. Specifically, we will be using Advanced Search to pre-select targets in the TESS Candidate Target List (CTL) that have temperatures between 2000-3500 K and non-zero priorities. After pre-selecting using these filters, you can either download the results, or conduct a search within that subset of the CTL.
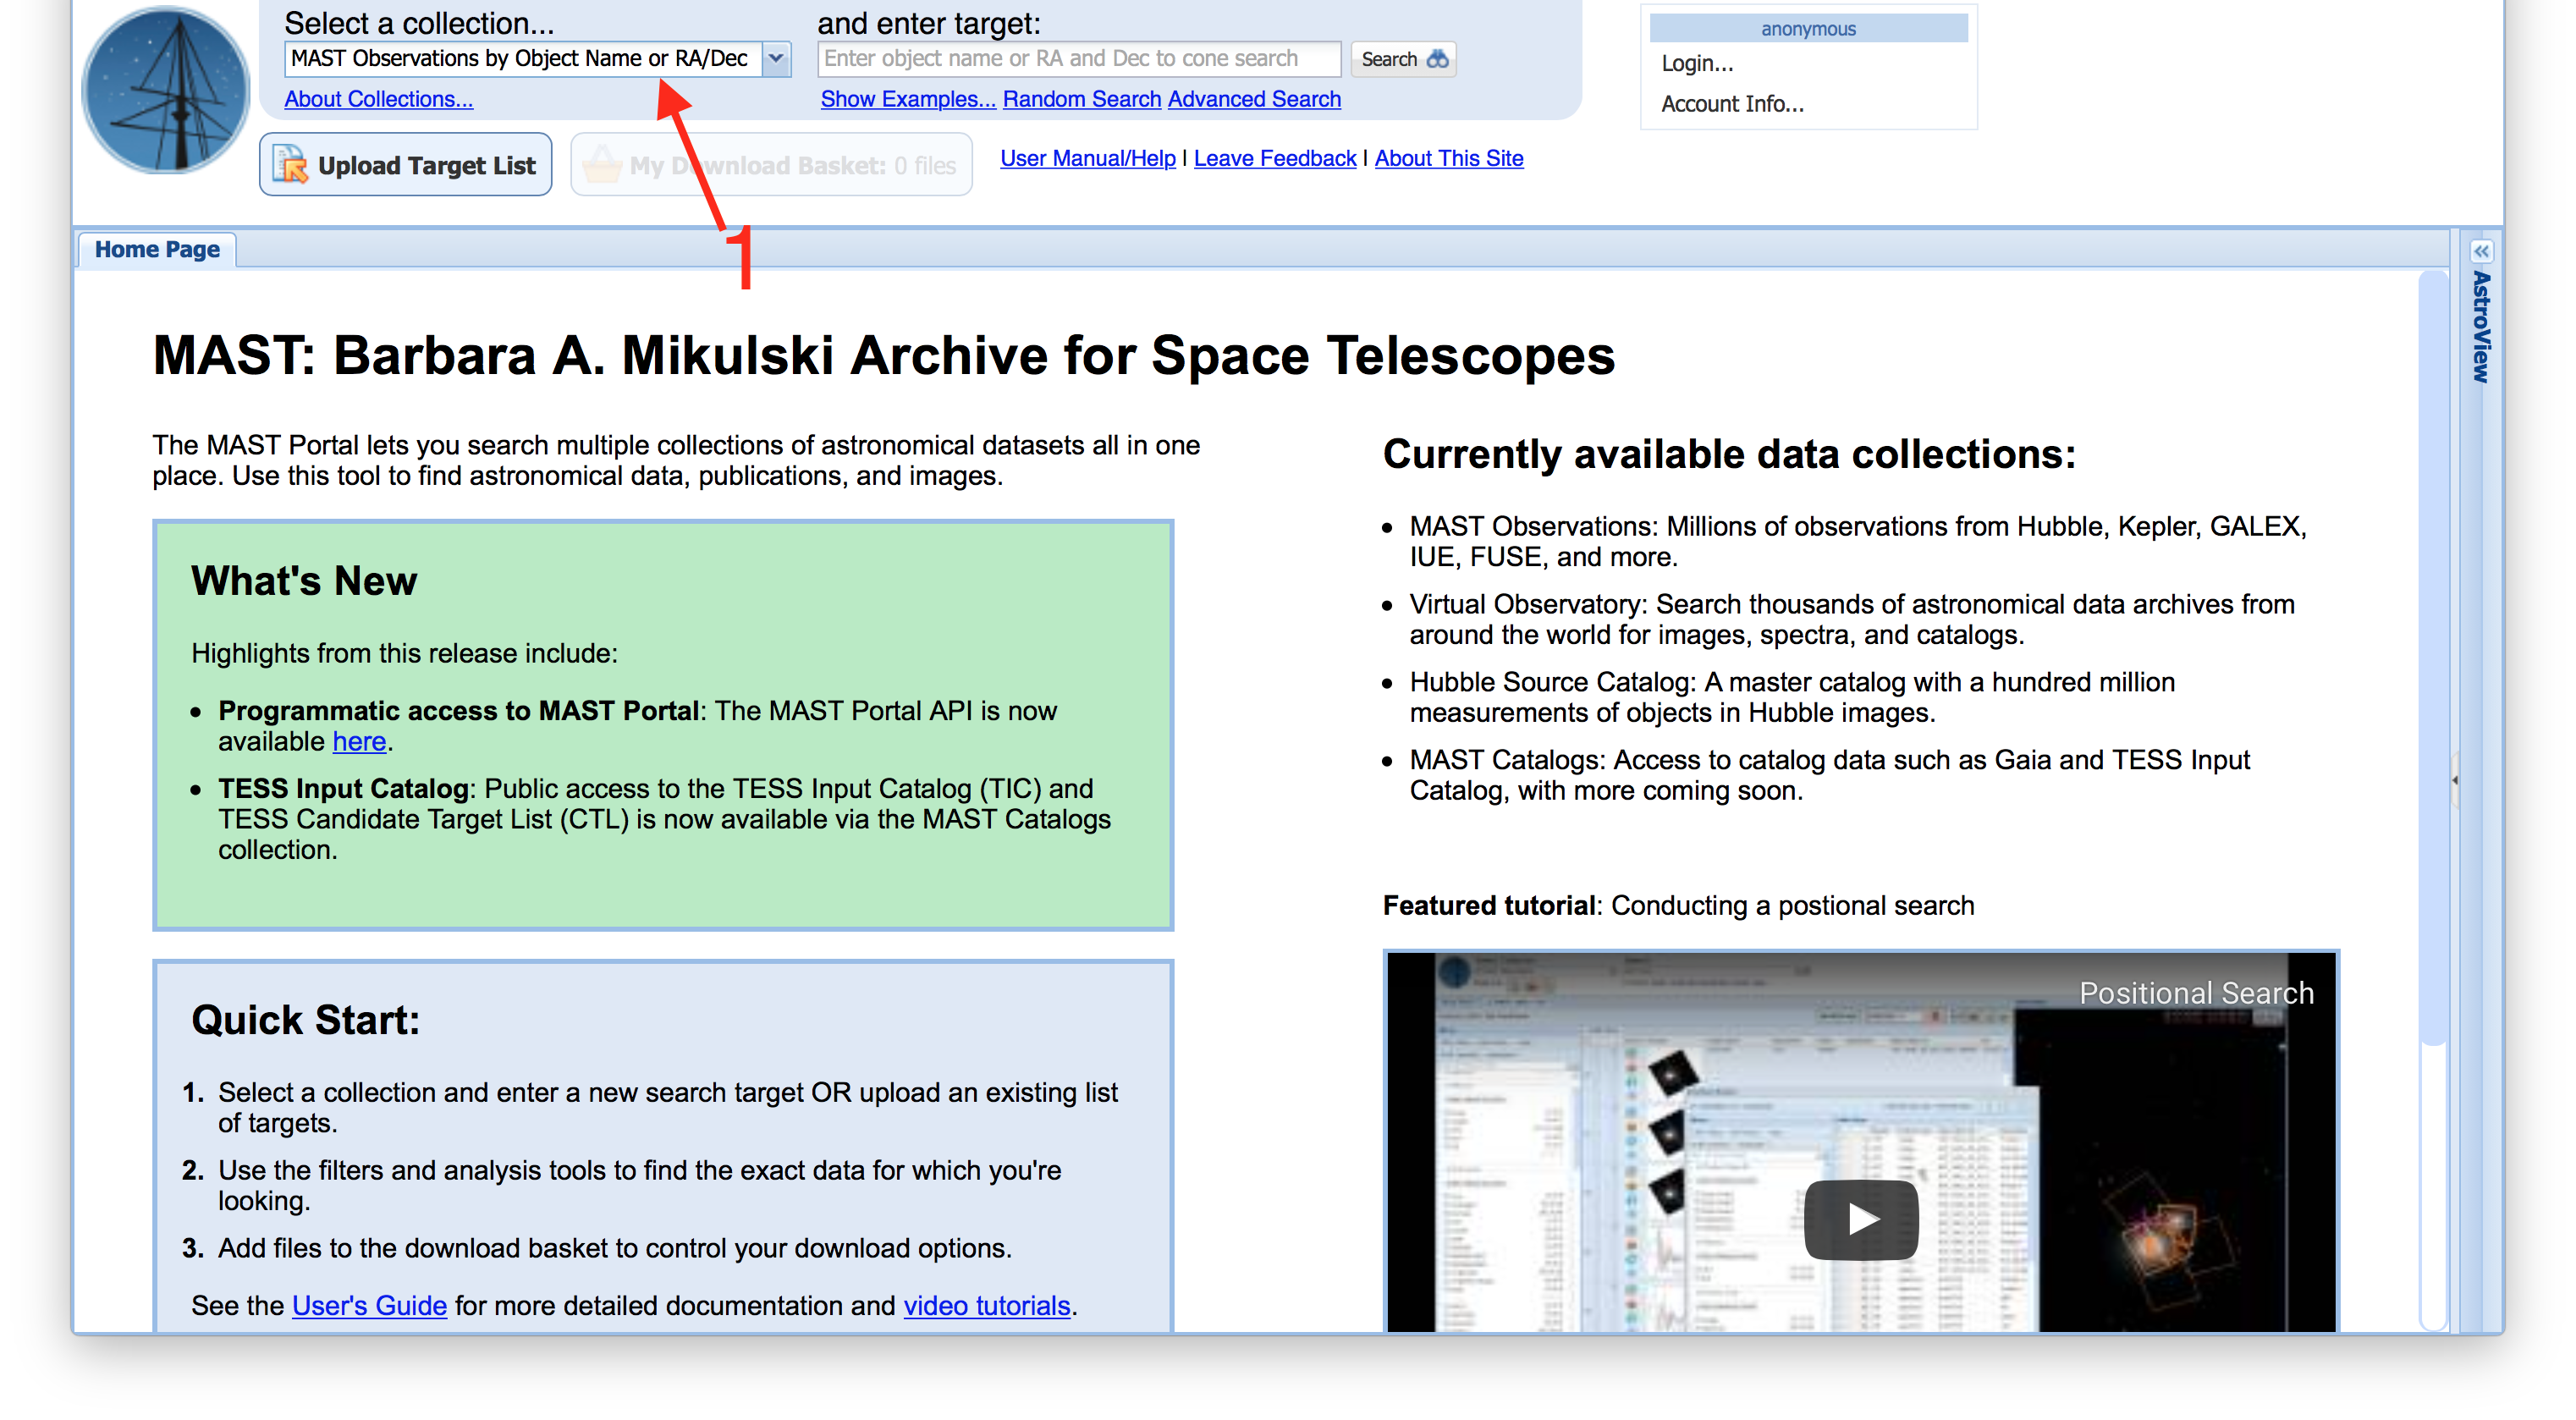
| Upon visiting the MAST Portal, the first step is to change the collection of data we are searching in from the Context menu (Item #1) at the top left. |
 |
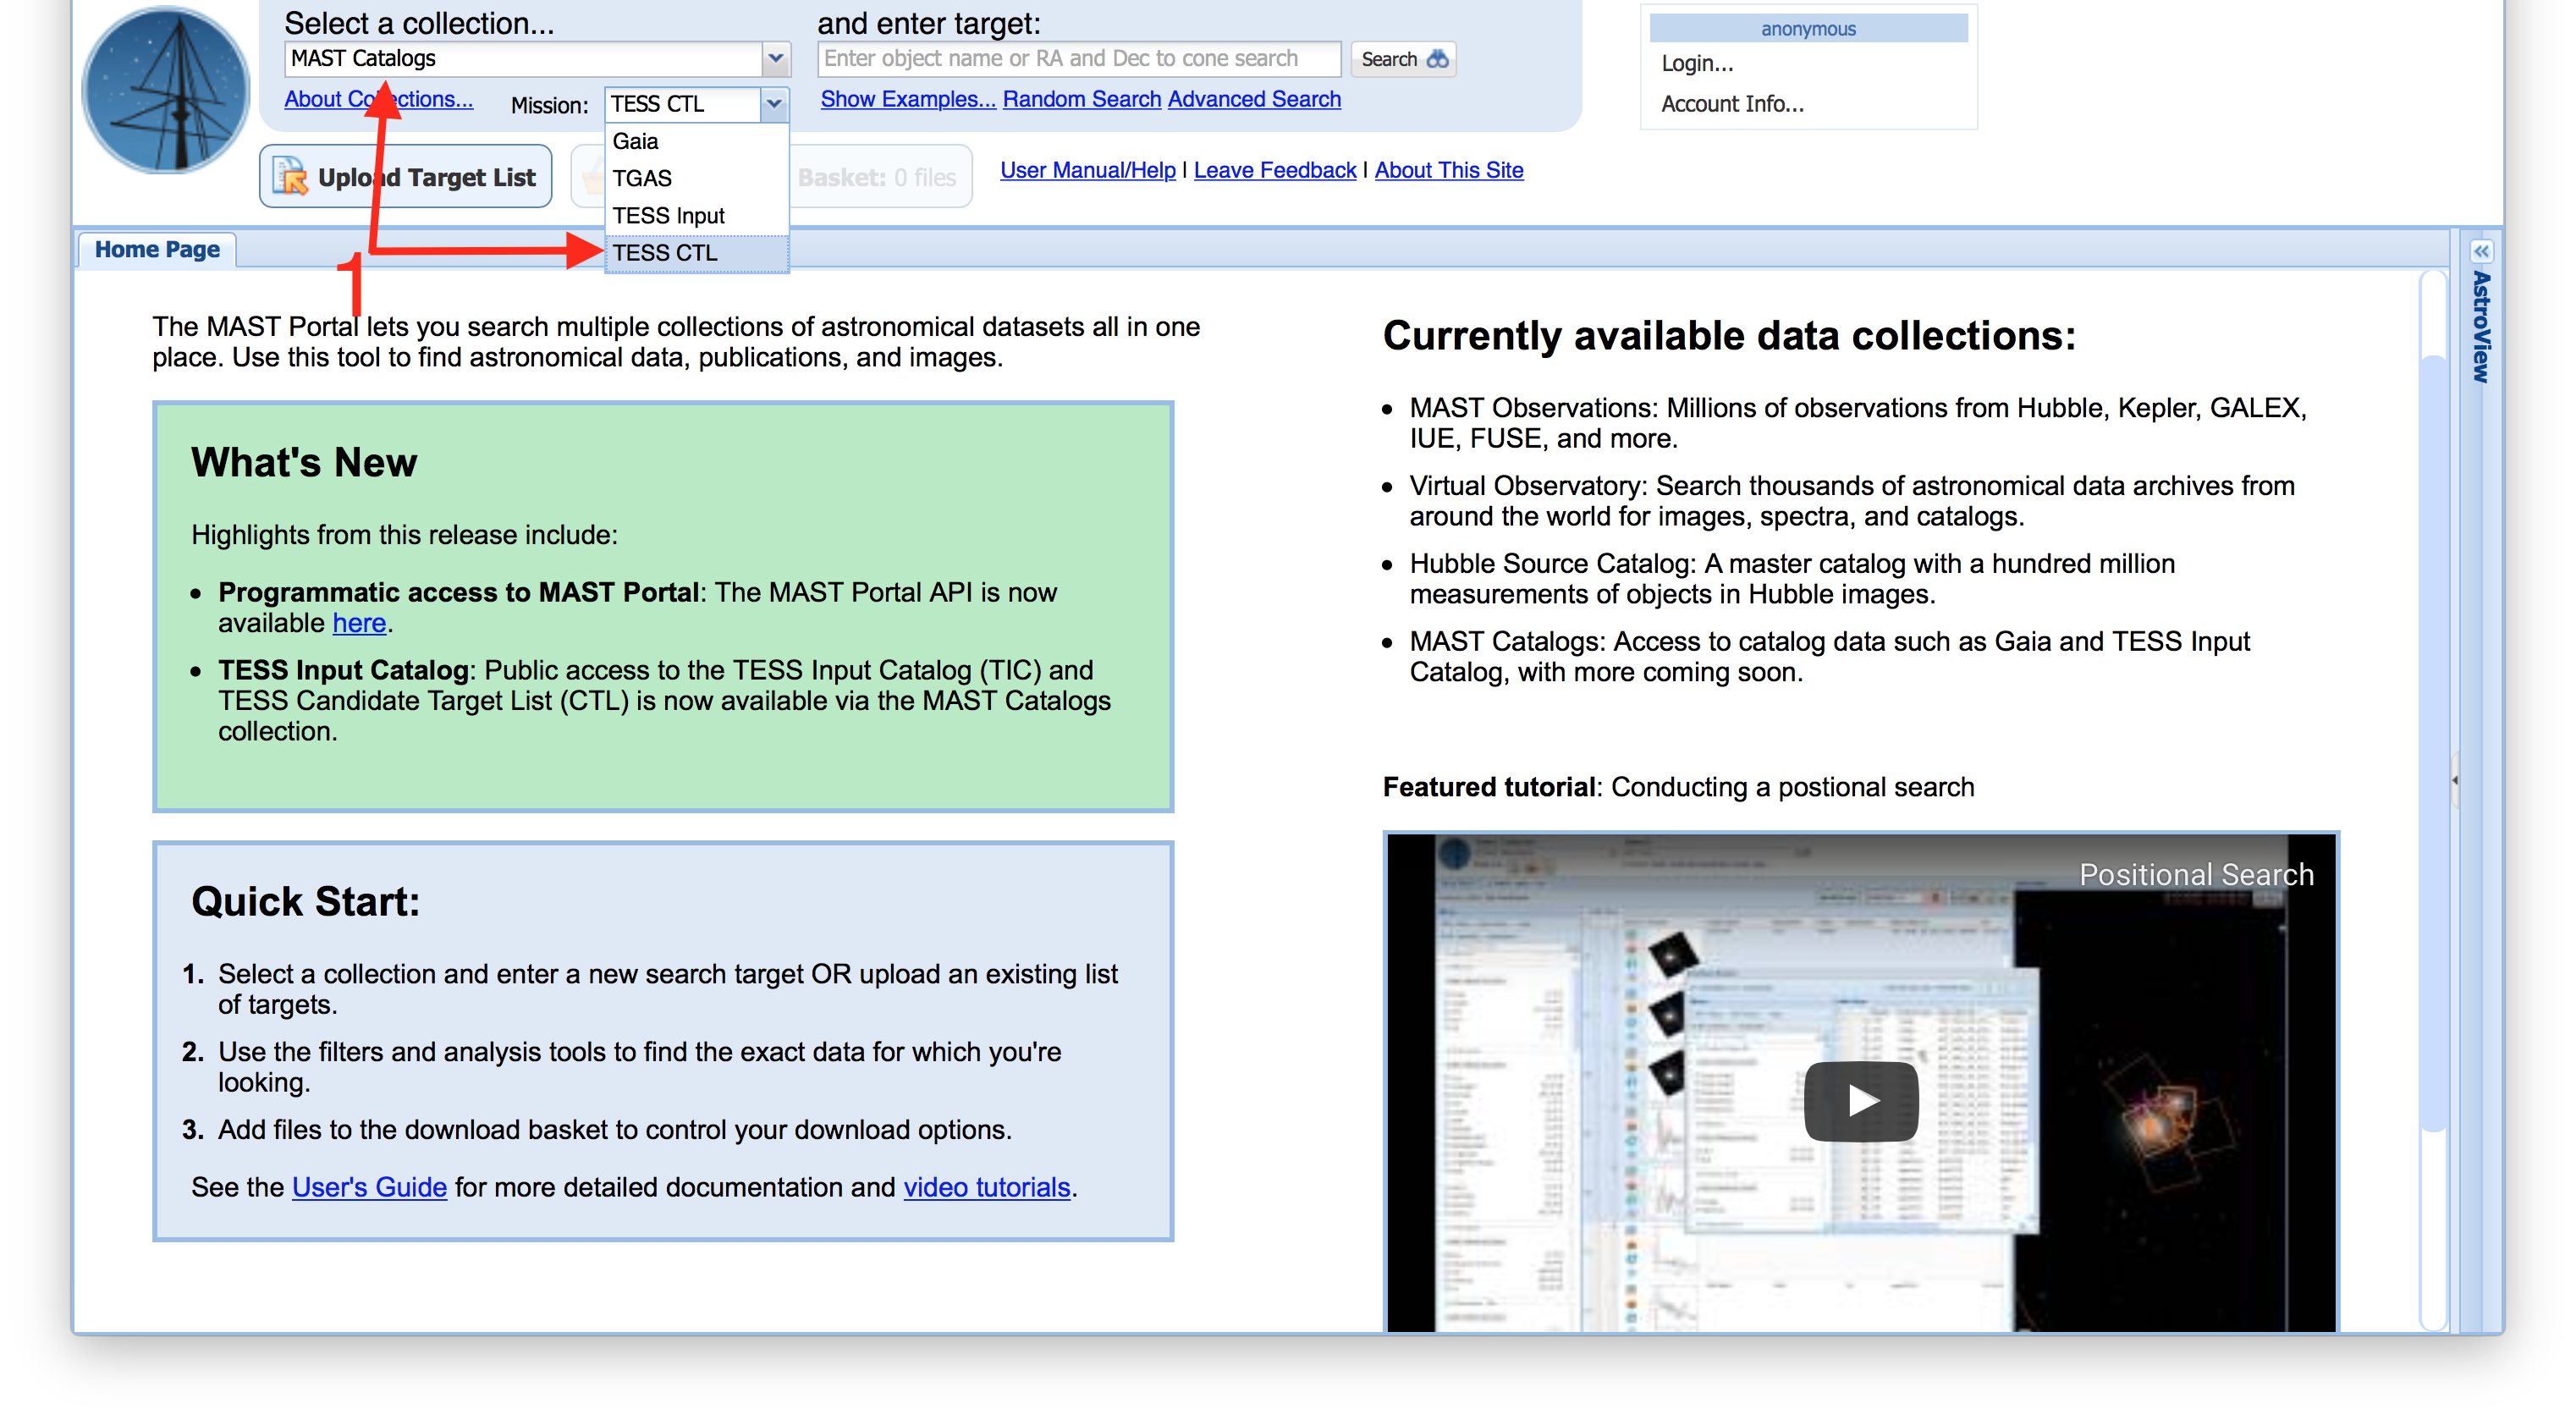
| From the Context drop-down menu, select MAST Catalogs, then, in the Mission drop-down menu that appears (Item #1), select either TESS Input for the TIC, or TESS CTL for the candidate target list. In this example, we'll select TESS CTL. |
 |
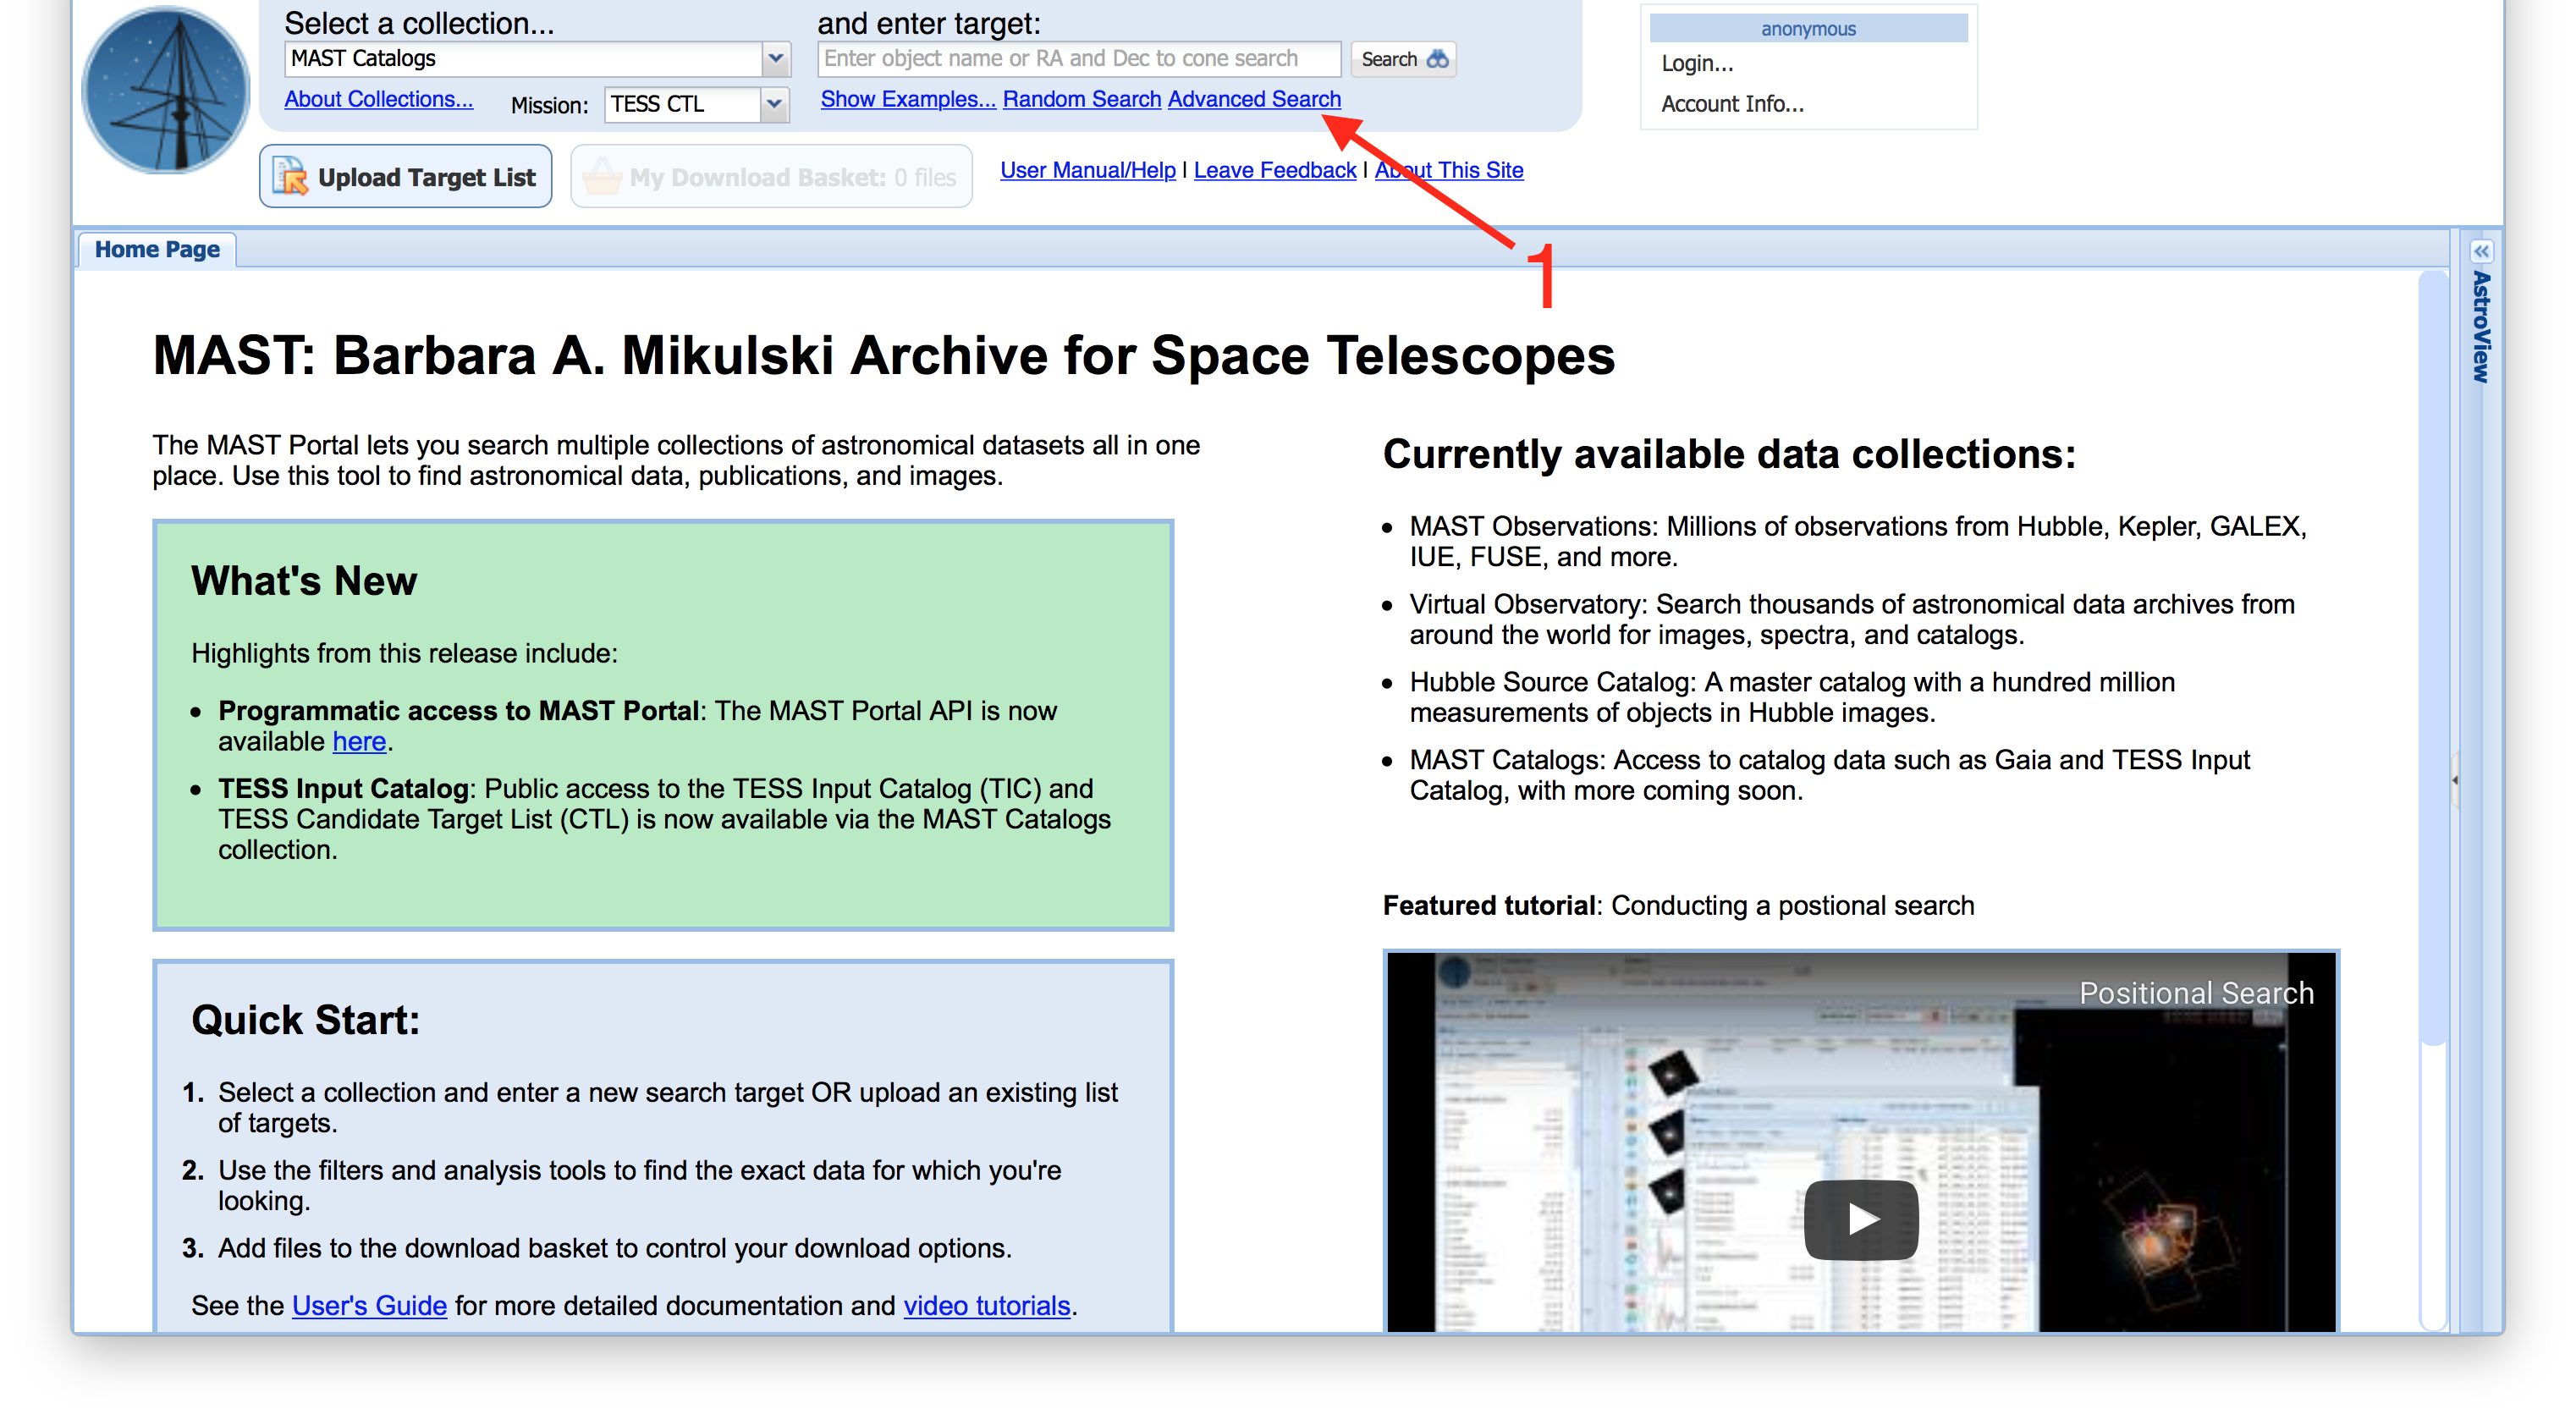
| After selecting the CTL in the Context menu, enter the Advanced Search using the link below the search box. Note: you only need to visit the link, at this point, do not enter anything into the Search Box. |
 |
| In the Advanced Search screen, you can add or remove sub-panels that can be used to apply a pre-search filter on any of the available columns (Item #1). When you add a sub-panel, it will show up on the right side of the menu, where you can apply limits on the ranges for numerical columns, or constraints in text fields by entering a value, including wildcards (Item #2). |
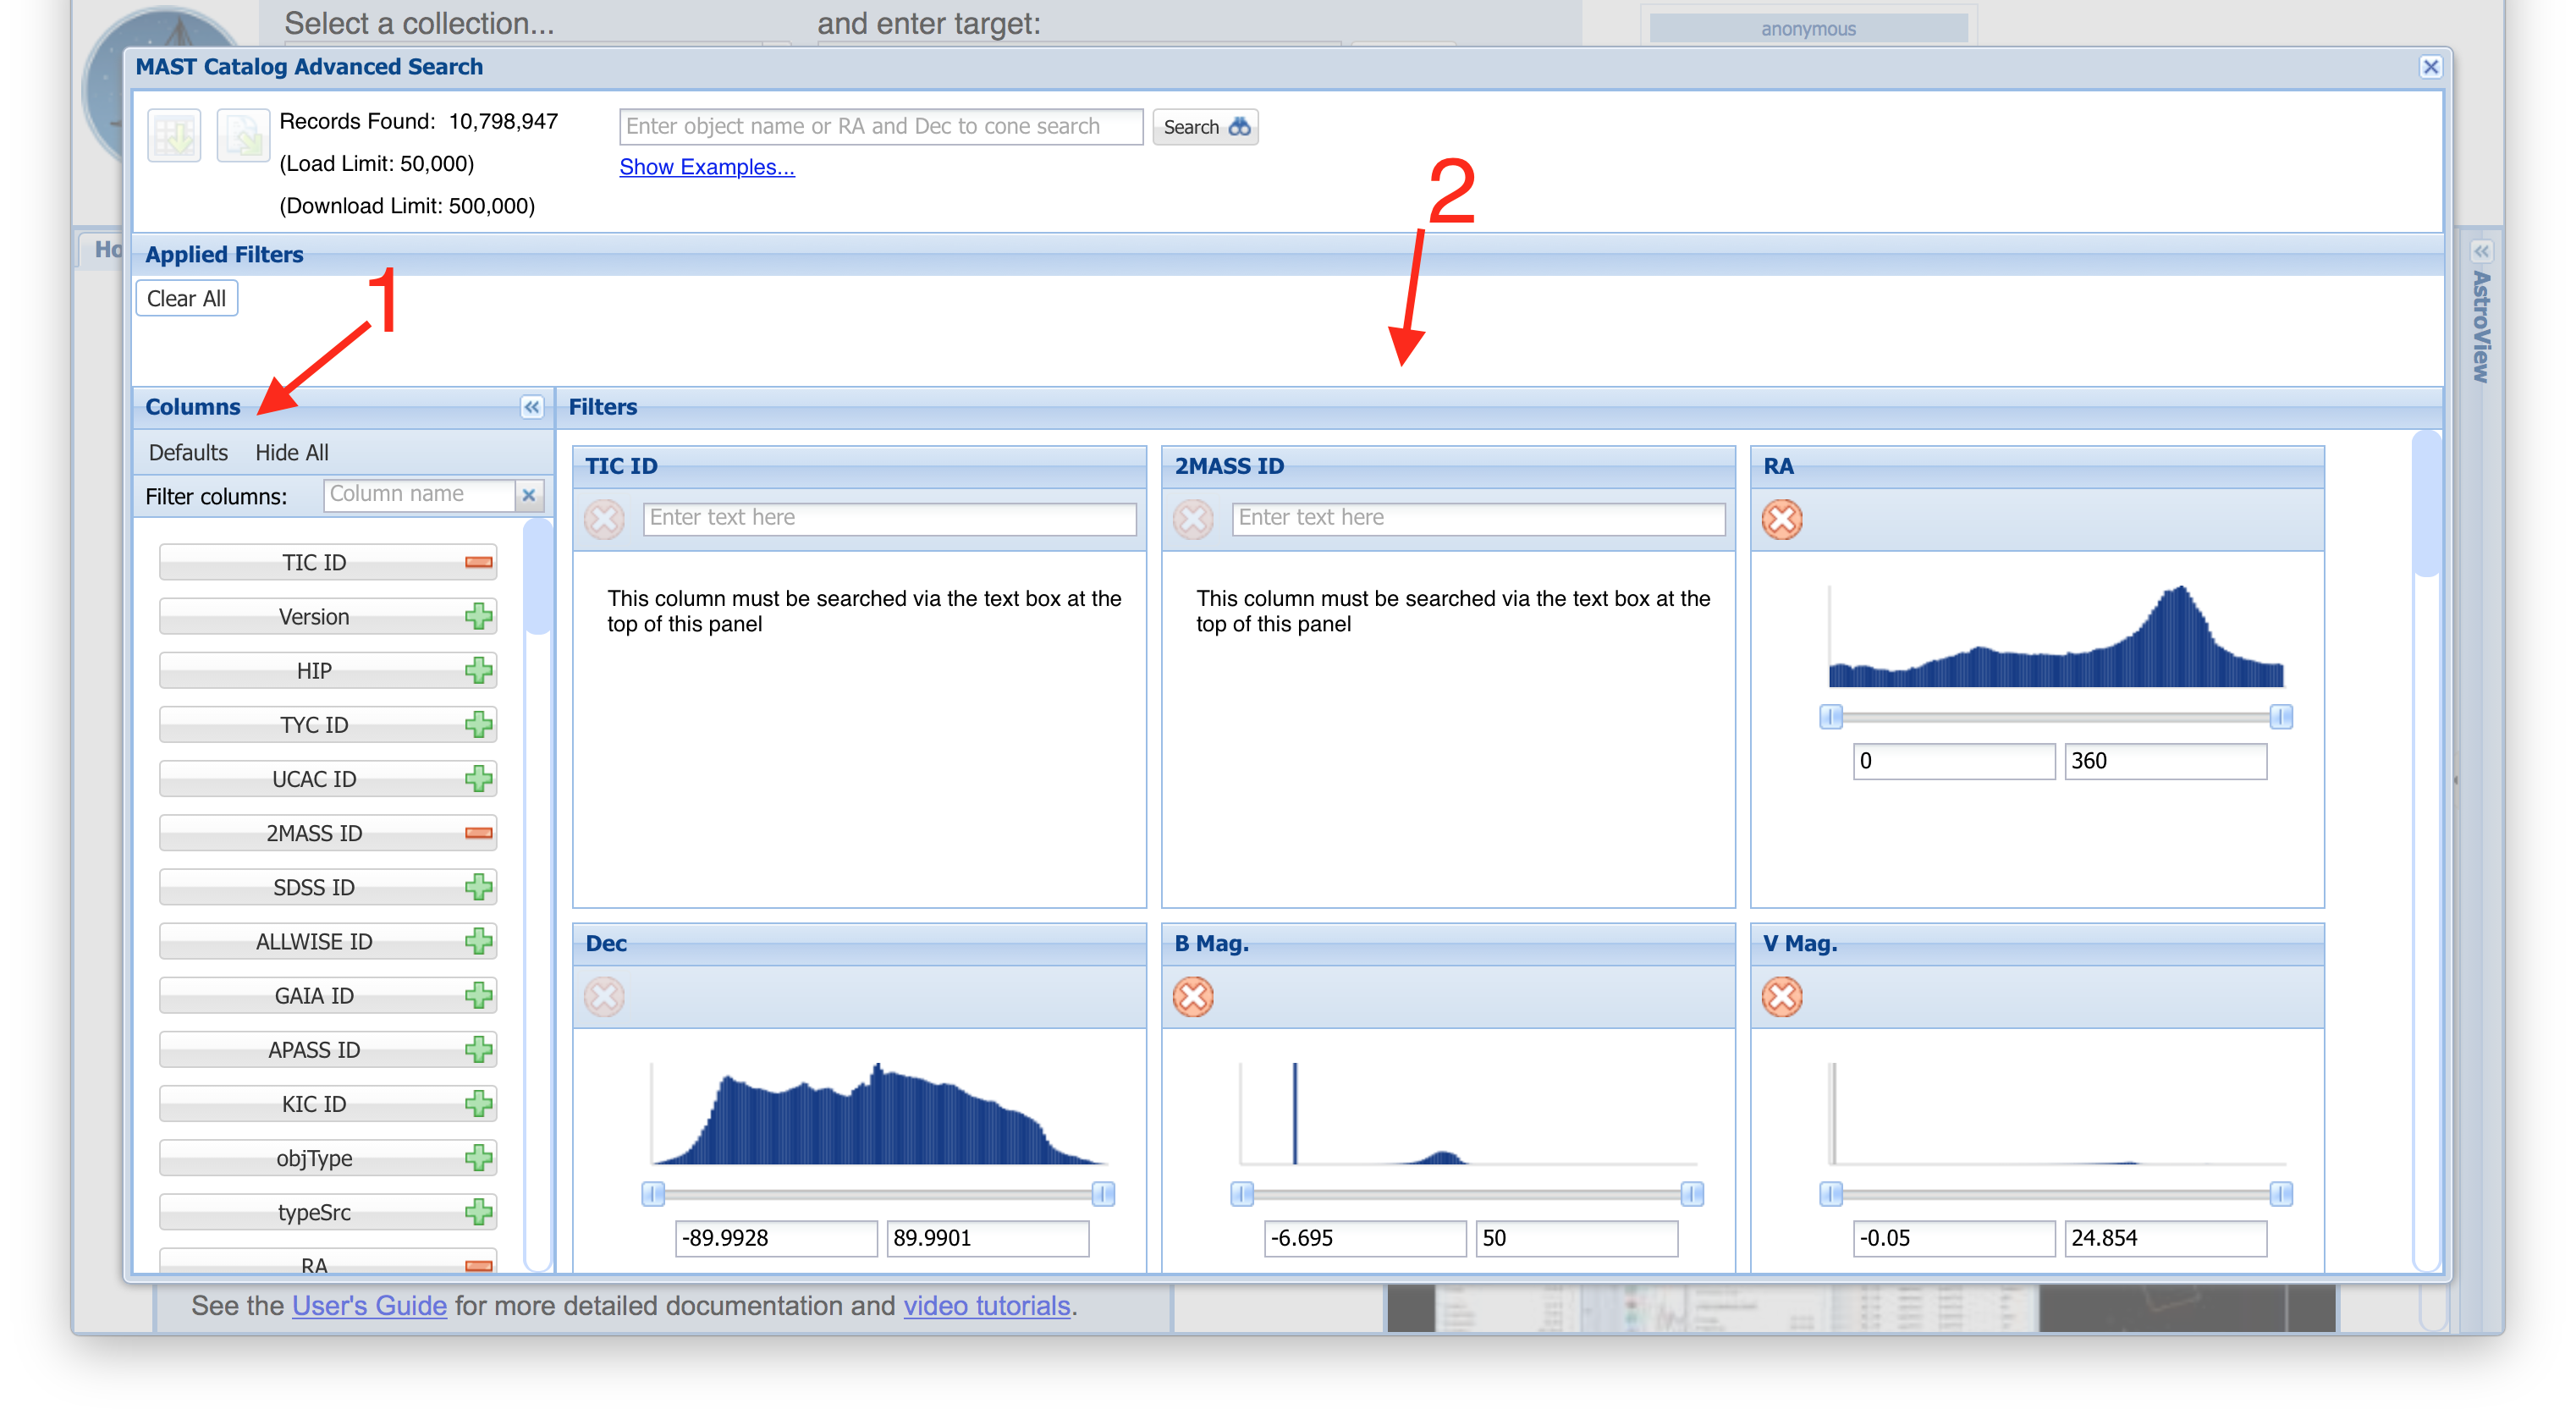 |
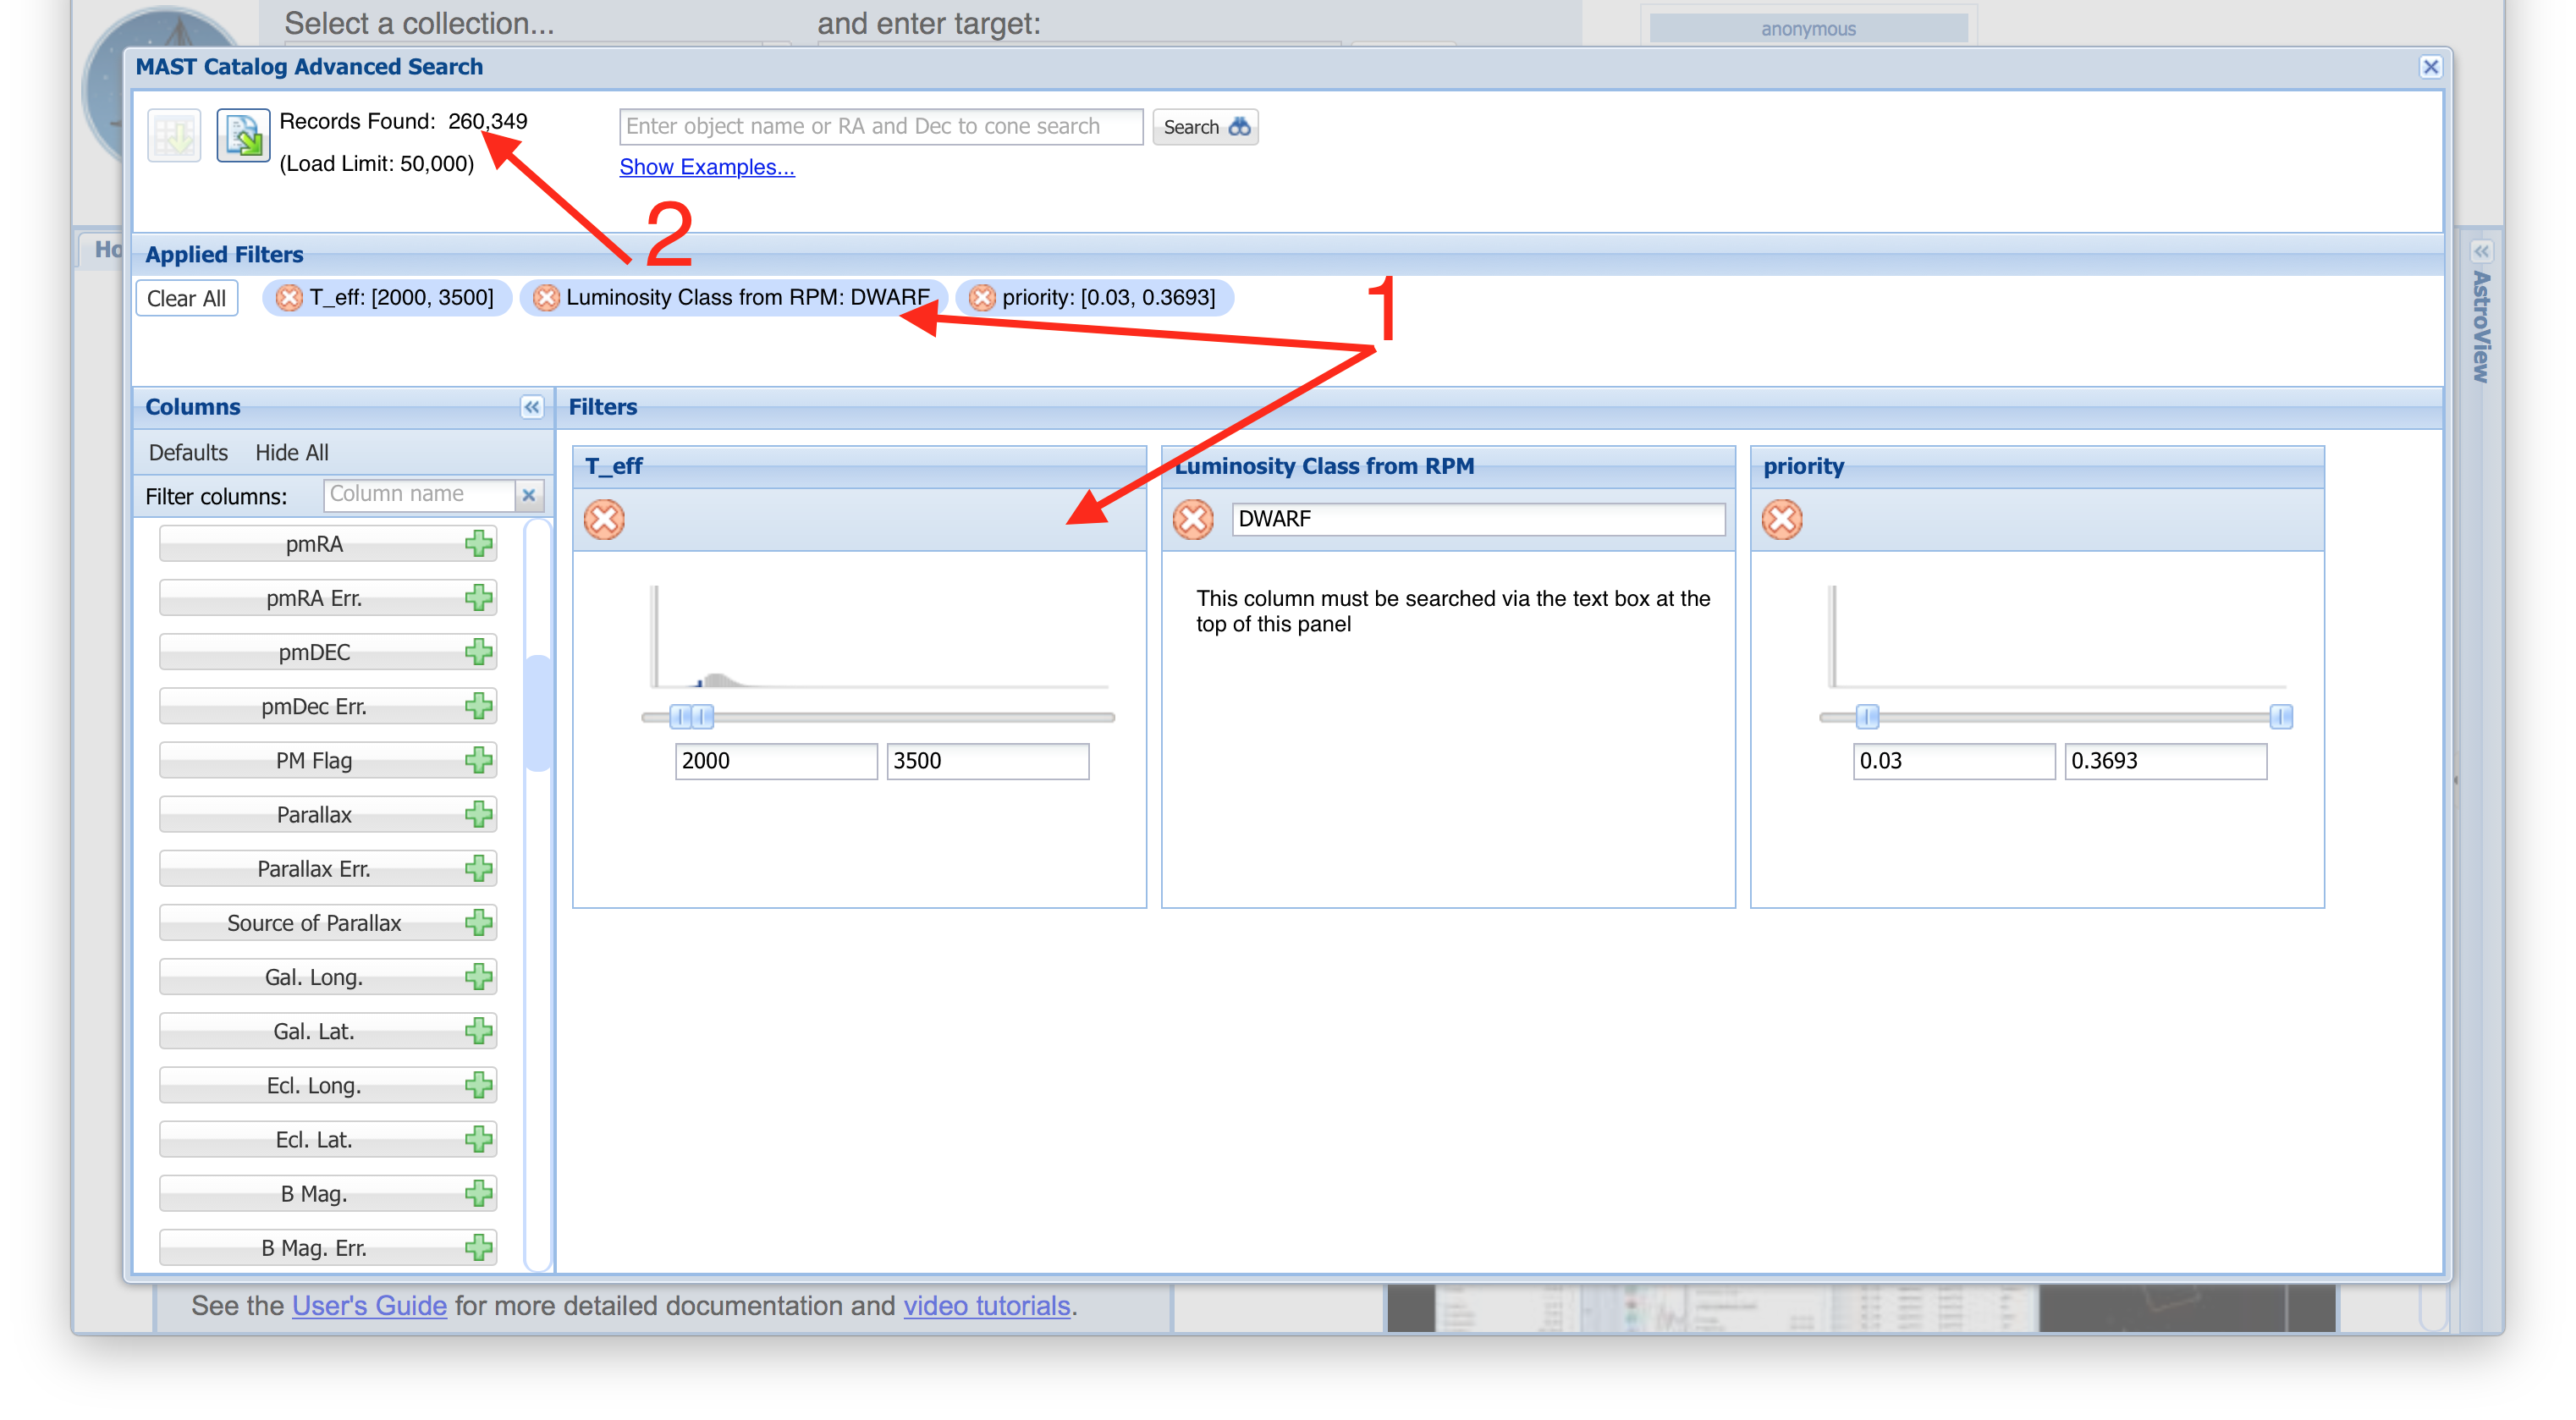
| In our example, we'll remove all the sub-panels except for T_eff, Luminosity Class From RPM, and Priority. It's not necessary to remove sub-panels if you don't want to filter on them, but we do here for clarity. We filter 2000. < T_eff < 3500. K, ensure only those with a "DWARF" Luminosity Class From RPM are selected, and change the minimum Priority = 0.03 (Item #1). As you apply each filter, the Portal will apply it and keep a running total of the number of return rows in the top-left (Item #2). |
 |
| Once your filters result in < 500,000 rows, the option to download the results will become active (Item #1). You can then specify an output file name and format to save those rows. |
 |
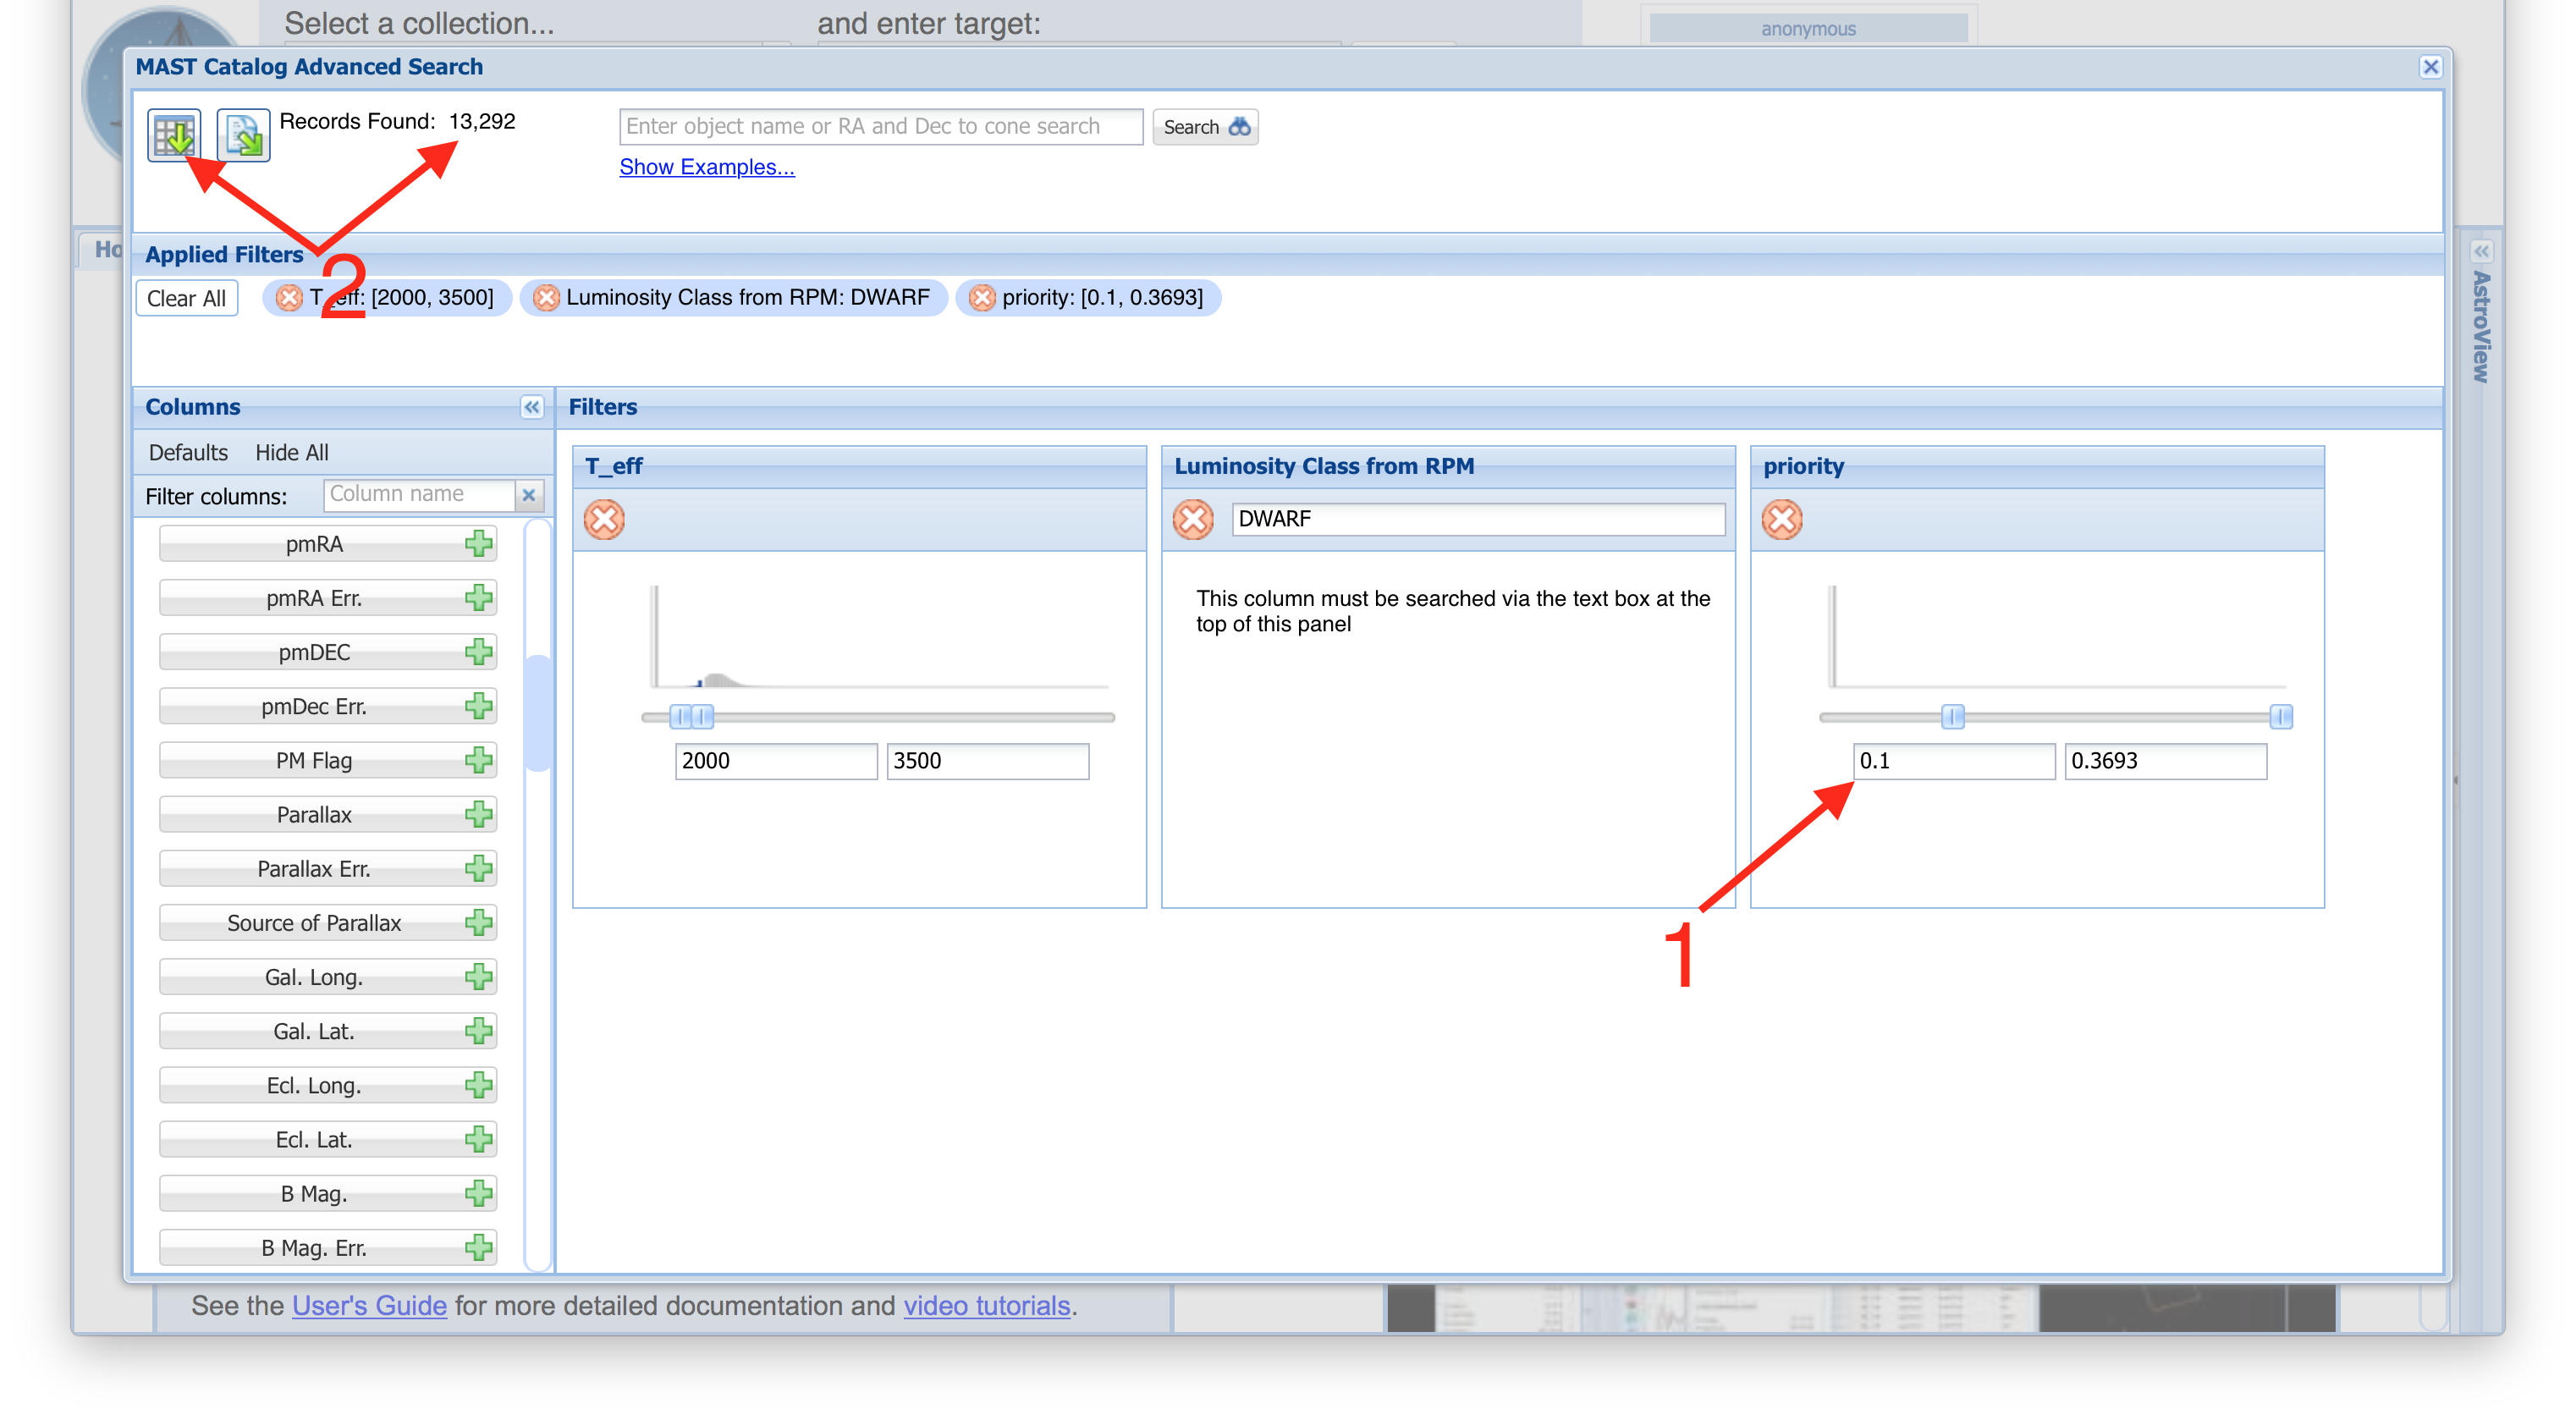
| Let's modify our filters a little bit, by changing the minimum Priority = 0.1 (Item #1). If you have < 50,000 rows after applying your filters, the option to load those rows into the Portal's main interface becomes available (Item #2). Once loaded, you will be able to further interact with these rows using the features of the Portal (cross-matching, AstroViewer, plotting, etc.) |
 |
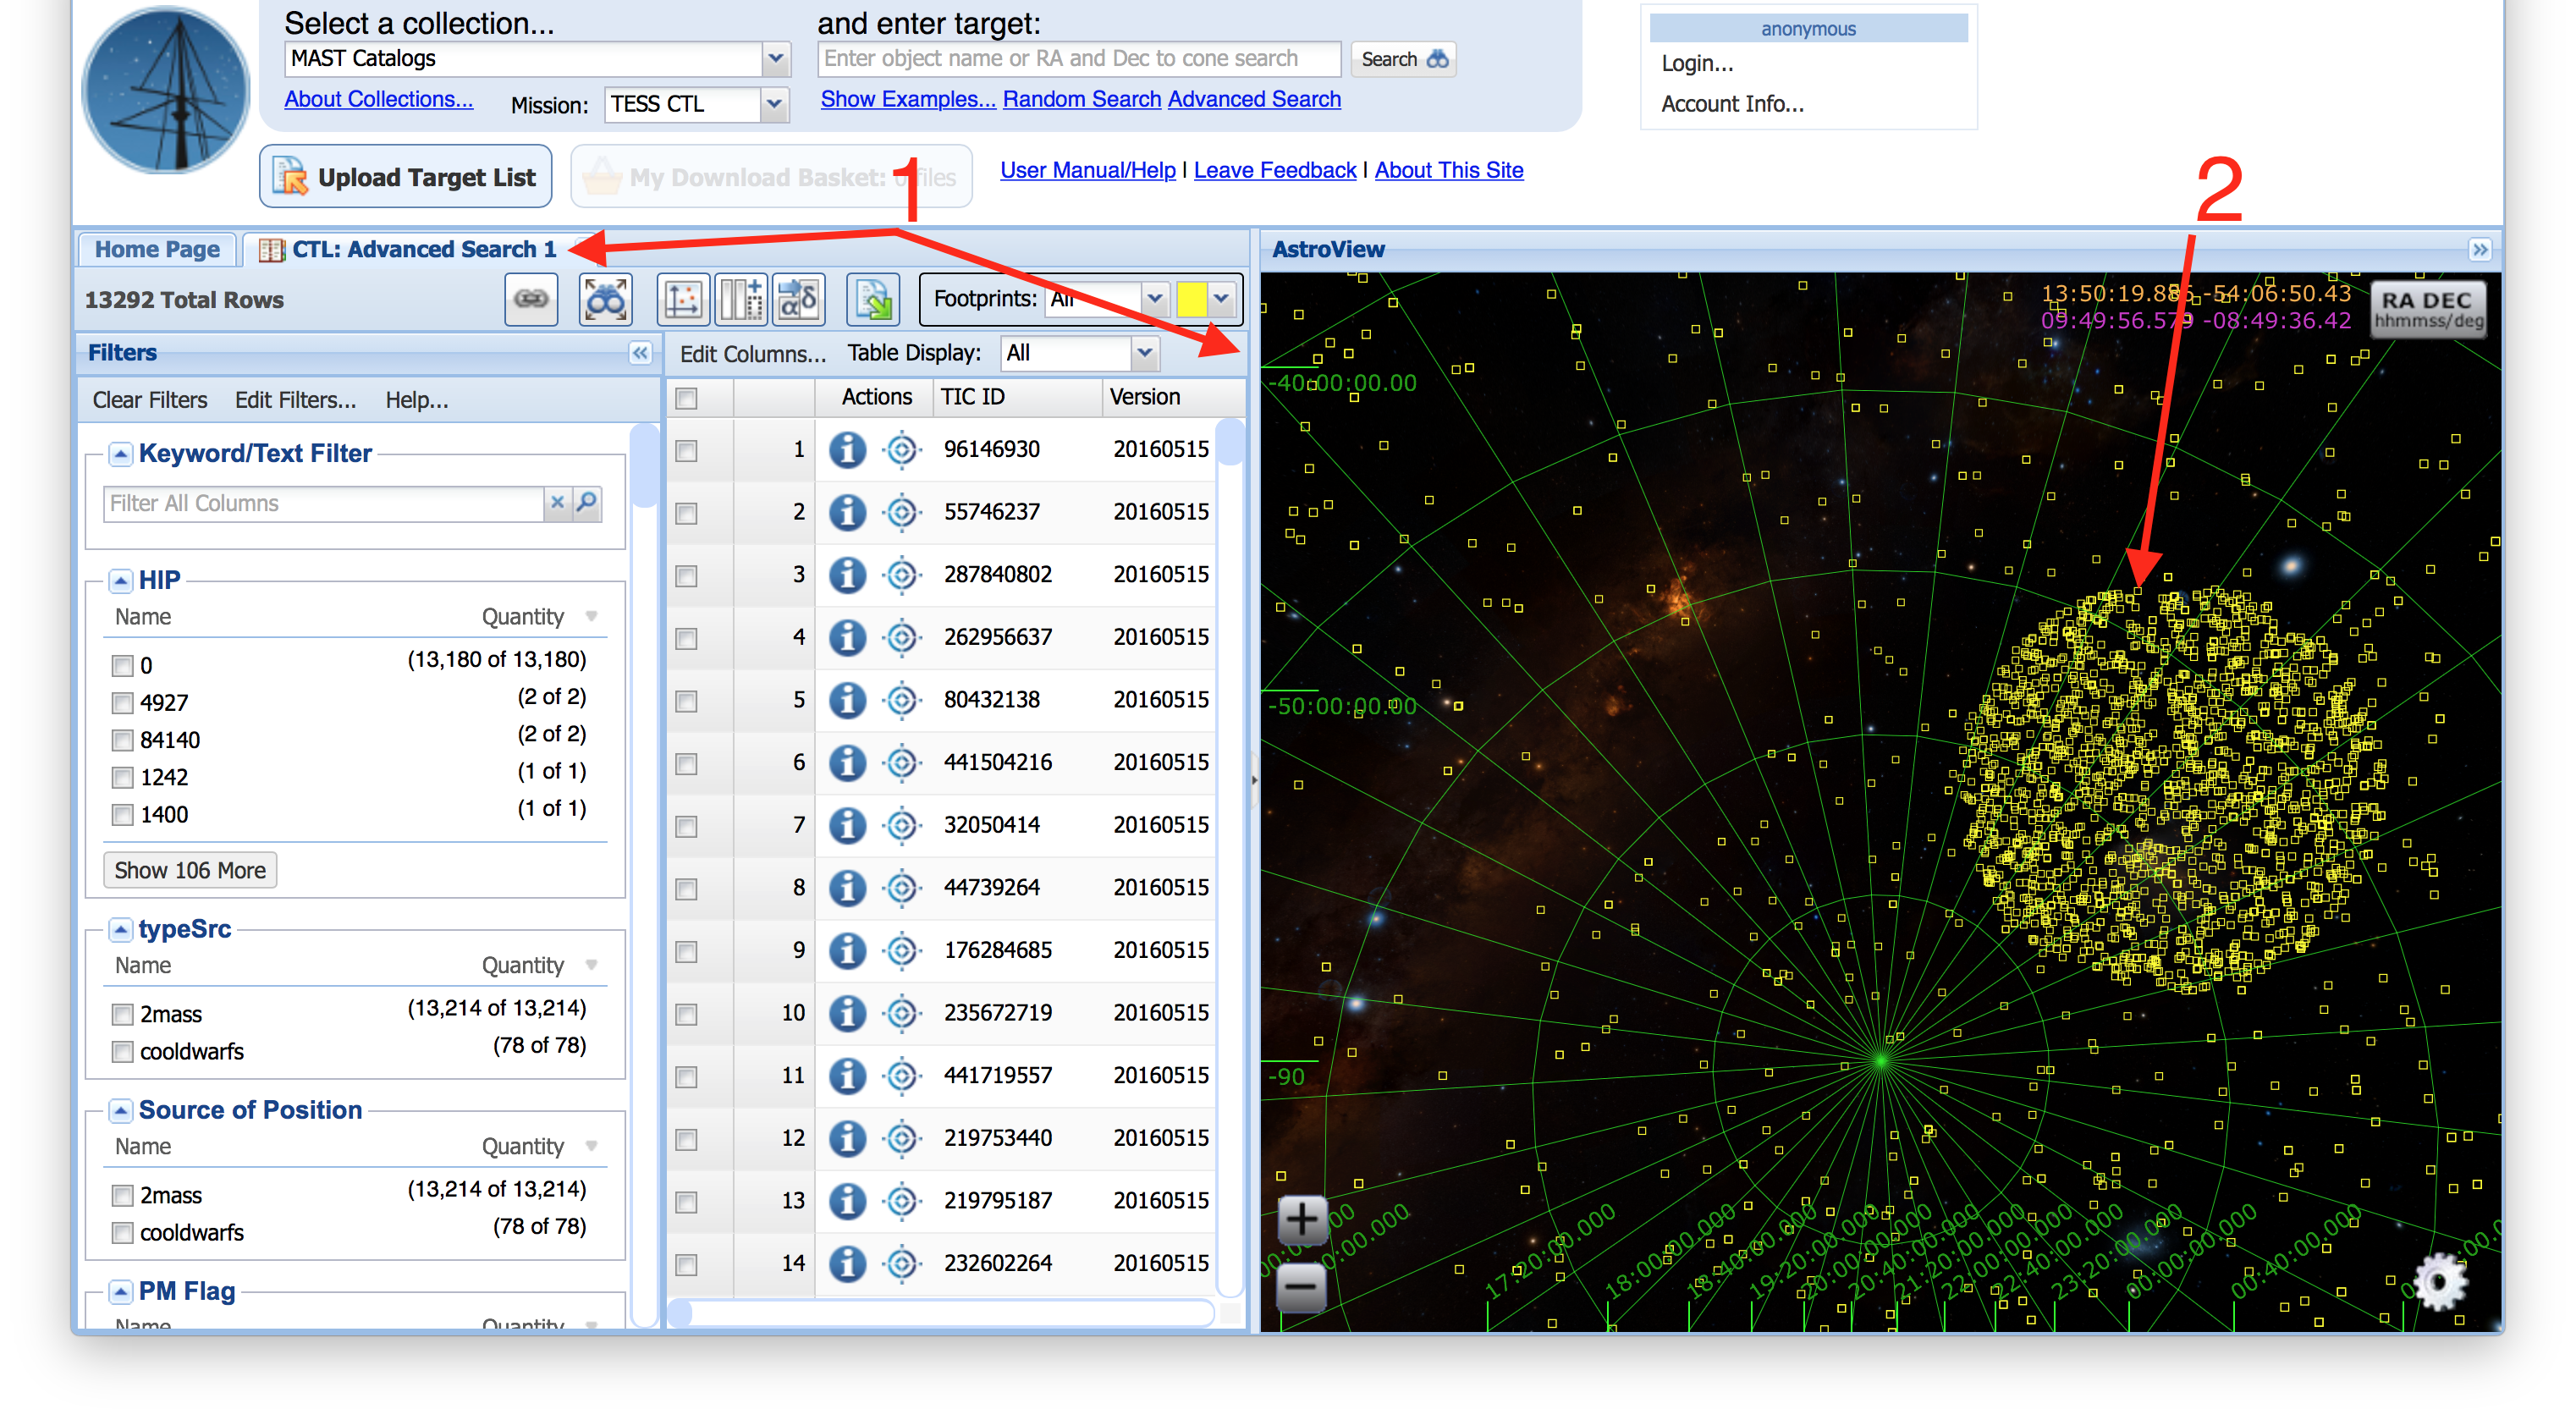
| Having loaded our Advanced Search results into the main Portal, we see they are stored in their own tab (Item #1). Indeed, if we turn on grid lines in the AstroViewer options (gear icon in the lower right of the AstroViewer) and pan down towards the southern pole, we can see a large concentration in the Southern Continuous Viewing Zone, as one might expect given the overall importance of targets in this part of the sky (Item #2). |
 |
|
|
|